
 sign in
 join
join
모델: 파일 업로드
- 본 번역문서의 원문은 File Uploads docs.microsoft.com 입니다.
- 본 번역문서는 MVC : Model - 파일 업로드 www.taeyo.net 에서도 함께 제공됩니다.
ASP.NET MVC의 액션은 작은 파일의 경우 간단한 모델 바인딩을 이용해서, 큰 파일은 스트리밍을 이용해서 한 개 이상의 파일 업로드를 지원합니다.
모델 바인딩을 이용한 작은 파일의 업로드
멀티-파트 HTML 폼을 사용하거나 JavaScript로 POST 요청을 구성하면 작은 크기의 파일을 업로드 할 수 있습니다. 다음은 다중 파일 업로드를 지원하는 Razor를 이용한 예제 폼을 보여줍니다:
<form method="post" enctype="multipart/form-data" asp-controller="UploadFiles" asp-action="Index">
<div class="form-group">
<div class="col-md-10">
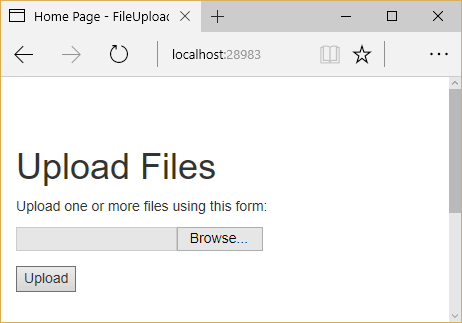
<p>Upload one or more files using this form:</p>
<input type="file" name="files" multiple />
</div>
</div>
<div class="form-group">
<div class="col-md-10">
<input type="submit" value="Upload" />
</div>
</div>
</form>
파일 업로드를 지원하기 위해서는 반드시 HTML 폼의 enctype 어트리뷰트를 multipart/form-data로 지정해야 합니다.
이 예제 마크업에 사용된 files input 요소는 다중 파일 업로드를 지원하며, 이 input 요소에서 multiple 어트리뷰트를 생략하면 단일 파일 하나만 업로드 할 수 있게 됩니다.
이 마크업은 브라우저에서 다음과 같이 렌더됩니다:
서버에 업로드 되는 개별 파일들은 IFormFile 인터페이스로 모델 바인딩을 통해서 접근할 수 있습니다.
IFormFile 인터페이스의 구조는 다음과 같습니다:
public interface IFormFile
{
    string ContentType { get; }
    string ContentDisposition { get; }
    IHeaderDictionary Headers { get; }
    long Length { get; }
    string Name { get; }
    string FileName { get; }
    Stream OpenReadStream();
    void CopyTo(Stream target);
    Task CopyToAsync(Stream target, CancellationToken cancellationToken = null);
}
모델 바인딩과 IFormFile 인터페이스를 이용해서 파일을 업로드 할 경우, 액션 메서드는 단일 IFormFile 인터페이스나 여러 파일들을 나타내는 IEnumerable<IFormFile>을 (또는 List<IFormFile>을) 매개변수로 전달받을 수 있습니다.
다음 예제는 하나 이상의 업로드 된 파일들을 루프를 돌면서, 로컬 파일 시스템에 파일들을 저장한 다음, 업로드 된 파일들의 전체 개수와 크기를 반환합니다.
using System.Collections.Generic;
using System.IO;
using System.Linq;
using System.Threading.Tasks;
using Microsoft.AspNetCore.Http;
using Microsoft.AspNetCore.Mvc;

namespace FileUploadSample.Controllers
{
    public class UploadFilesController : Controller
    {
        [HttpPost("UploadFiles")]
        public async Task<IActionResult> Post(List<IFormFile> files)
        {
            long size = files.Sum(f => f.Length);

            // full path to file in temp location
            var filePath = Path.GetTempFileName();

            foreach (var formFile in files)
            {
                if (formFile.Length > 0)
                {
                    using (var stream = new FileStream(filePath, FileMode.Create))
                    {
                        await formFile.CopyToAsync(stream);
                    }
                }
            }

            // process uploaded files

            return Ok(new { count = files.Count, size, filePath});
        }
    }
}
IFormFile 기법을 이용해서 업로드 된 파일들은 처리되기 전까지 웹 서버의 메모리나 디스크에 버퍼링됩니다.
IFormFile의 콘텐츠는 액션 메서드 내부에서 스트림으로 접근 가능합니다.
로컬 파일 시스템 외에도 Azure blob 저장소나 Entity Framework로 파일을 스트리밍 할 수 있습니다.
이진 파일 데이터를 Entity Framework를 이용해서 데이터베이스에 저장하려면, 엔터티의 속성 형식을 byte[]로 정의합니다:
public class ApplicationUser : IdentityUser
{
    public byte[] AvatarImage { get; set; }
}
뷰 모델 속성의 형식은 IFormFile 형식으로 지정합니다:
public class RegisterViewModel
{
    // other properties omitted

    public IFormFile AvatarImage { get; set; }
}
노트:
이미 살펴본 것처럼 액션 메서드의 매개변수나 뷰 모델 속성에 IFormFile 인터페이스를 직접 사용할 수 있습니다.
그리고 IFormFile를 스트림에 복사한 다음, 이를 byte 배열에 저장합니다:
//
// POST: /Account/Register
[HttpPost]
[AllowAnonymous]
[ValidateAntiForgeryToken]
public async Task<IActionResult> Register(RegisterViewModel model)
{
    ViewData["ReturnUrl"] = returnUrl;
    if (ModelState.IsValid)
    {
        var user = new ApplicationUser {
        UserName = model.Email,
        Email = model.Email
        };
        using (var memoryStream = new MemoryStream())
        {
            await model.AvatarImage.CopyToAsync(memoryStream);
            user.AvatarImage = memoryStream.ToArray();
        }
    // additional logic omitted
}
노트: 이진 데이터를 관계형 데이터베이스에 저장할 경우, 성능에 악영향을 줄 수도 있으므로 주의하시기 바랍니다.
스트리밍을 이용한 큰 파일의 업로드
만약 업로드 되는 파일의 크기나 빈도로 인해서 응용 프로그램의 리소스에 문제가 발생한다면, 파일을 엔터티에 버퍼링하는 대신 (이전 절에서 살펴본 모델 바인딩 방식처럼), 파일 업로드를 스트리밍 하는 방식을 고려해봐야 합니다.
IFormFile 인터페이스와 모델 바인딩을 사용하는 방법은 매우 간단한 접근 방식인 반면, 스트리밍 방식은 속성을 구현하기 위해서 더 많은 과정을 필요로 합니다.
노트: 64KB를 초과하는 버퍼링 되는 모든 단일 파일들은 RAM에서 서버의 디스크 상에 위치한 임시 파일로 이동됩니다. 파일 업로드에 사용되는 리소스는(디스크, RAM) 동시에 업로드 되는 파일의 개수와 크기에 따라 결정됩니다. 스트리밍은 성능보다는 규모와 관련된 기법입니다. 만약, 과도하게 많은 업로드를 버퍼링하려고 시도할 경우, 메모리나 디스크가 부족하다면 사이트가 다운될 것입니다.
다음 예제는 JavaScript/Angular를 이용해서 컨트롤러 액션으로 스트리밍하는 방법을 보여줍니다.
파일의 요청 검증 토큰(Antiforgery Token)은 사용자 지정 필터 어트리뷰트를 통해서 생성된 다음, 요청 본문 대신 HTTP 헤더를 통해서 전달됩니다.
액션 메서드가 업로드 된 데이터를 직접 처리하기 때문에, 모델 바인딩은 다른 필터에 의해서 비활성화됩니다.
액션 내부에서는 개별적인 MultipartSection을 읽는 MultipartReader를 이용해서 폼의 콘텐츠를 읽고, 파일들을 처리하거나 적절한 방법으로 콘텐츠를 저장합니다.
모든 섹션들을 읽은 다음에는 액션이 자체적으로 모델 바인딩을 수행합니다.
먼저, 초기화를 수행하는 액션에서 폼을 로드하고 쿠키에 요청 검증 토큰을 저장합니다
(GenerateAntiforgeryTokenCookieForAjax 어트리뷰트를 통해서):
[HttpGet]
[GenerateAntiforgeryTokenCookieForAjax]
public IActionResult Index()
{
    return View();
}
이 사용자 지정 어트리뷰트는 ASP.NET Core의 내장 Antiforgery 기능을 이용해서 쿠키에 요청 토큰을 설정합니다:
using Microsoft.AspNetCore.Antiforgery;
using Microsoft.AspNetCore.Http;
using Microsoft.AspNetCore.Mvc.Filters;
using Microsoft.Extensions.DependencyInjection;

namespace FileUploadSample.Filters
{
    public class GenerateAntiforgeryTokenCookieForAjaxAttribute : ActionFilterAttribute
    {
        public override void OnActionExecuted(ActionExecutedContext context)
        {
            var antiforgery = context.HttpContext.RequestServices.GetService<IAntiforgery>();

            // We can send the request token as a JavaScript-readable cookie, and Angular will use it by default.
            var tokens = antiforgery.GetAndStoreTokens(context.HttpContext);
            context.HttpContext.Response.Cookies.Append(
                "XSRF-TOKEN",
                tokens.RequestToken,
                new CookieOptions() { HttpOnly = false });
        }
    }
}
Angular는 요청 검증 토큰을 자동으로 X-XSRF-TOKEN이라는 요청 헤더에 담아서 전달해줍니다.
따라서, ASP.NET Core MVC 응용 프로그램에서도 이 헤더를 참조하도록 Startup.cs를 구성해야 합니다:
public void ConfigureServices(IServiceCollection services)
{
    // Angular's default header name for sending the XSRF token.
    services.AddAntiforgery(options => options.HeaderName = "X-XSRF-TOKEN");

    services.AddMvc();
}
다음의 DisableFormValueModelBinding 어트리뷰트는 Upload 액션 메서드의 모델 바인딩을 비활성화시키기 위해서 사용됩니다:
using System;
using System.Linq;
using Microsoft.AspNetCore.Mvc.Filters;
using Microsoft.AspNetCore.Mvc.ModelBinding;

namespace FileUploadSample.Filters
{
    [AttributeUsage(AttributeTargets.Class | AttributeTargets.Method)]
    public class DisableFormValueModelBindingAttribute : Attribute, IResourceFilter
    {
        public void OnResourceExecuting(ResourceExecutingContext context)
        {
            var formValueProviderFactory = context.ValueProviderFactories
                .OfType<FormValueProviderFactory>()
                .FirstOrDefault();
            if (formValueProviderFactory != null)
            {
                context.ValueProviderFactories.Remove(formValueProviderFactory);
            }

            var jqueryFormValueProviderFactory = context.ValueProviderFactories
                .OfType<JQueryFormValueProviderFactory>()
                .FirstOrDefault();
            if (jqueryFormValueProviderFactory != null)
            {
                context.ValueProviderFactories.Remove(jqueryFormValueProviderFactory);
            }
        }

        public void OnResourceExecuted(ResourceExecutedContext context)
        {
        }
    }
}
모델 바인딩이 비활성화되기 때문에, Upload 액션 메서드는 아무런 매개변수도 전달받지 않습니다.
대신, 액션에서 ControllerBase의 Request 속성에 직접 접근해서 동작하며, MultipartReader를 이용해서 각 섹션들을 읽습니다.
파일은 GUID 파일명으로 저장되고, 키/값 데이터는 KeyValueAccumulator에 저장됩니다.
모든 섹션을 읽은 다음에는 KeyValueAccumulator의 콘텐츠를 이용해서 폼 데이터를 모델 형식에 바인딩 합니다.
다음은 완전한 Upload 메서드의 코드를 보여줍니다:
// 1. Disable the form value model binding here to take control of handling potentially large files.
// 2. Typically antiforgery tokens are sent in request body, but since we do not want to read the request body
//    early, the tokens are made to be sent via headers. The antiforgery token filter first looks for tokens
//    in the request header and then falls back to reading the body.
[HttpPost]
[DisableFormValueModelBinding]
[ValidateAntiForgeryToken]
public async Task<IActionResult> Upload()
{
    if (!MultipartRequestHelper.IsMultipartContentType(Request.ContentType))
    {
        return BadRequest("Expected a multipart request, but got " +
            Request.ContentType);
    }

    // Used to accumulate all the form url encoded key value pairs in the request.
    var formAccumulator = new KeyValueAccumulator();
    string targetFilePath = null;

    var boundary = MultipartRequestHelper.GetBoundary(
        MediaTypeHeaderValue.Parse(Request.ContentType),
        _defaultFormOptions.MultipartBoundaryLengthLimit);
    var reader = new MultipartReader(boundary, HttpContext.Request.Body);

    var section = await reader.ReadNextSectionAsync();
    while (section != null)
    {
        ContentDispositionHeaderValue contentDisposition;
        var hasContentDispositionHeader = ContentDispositionHeaderValue.TryParse(section.ContentDisposition,
            out contentDisposition);

        if (hasContentDispositionHeader)
        {
            if (MultipartRequestHelper.HasFileContentDisposition(contentDisposition))
            {
                targetFilePath = Path.GetTempFileName();
                using (var targetStream = System.IO.File.Create(targetFilePath))
                {
                    await section.Body.CopyToAsync(targetStream);

                    _logger.LogInformation($"Copied the uploaded file '{targetFilePath}'");
                }
            }
            else if (MultipartRequestHelper.HasFormDataContentDisposition(contentDisposition))
            {
                // Content-Disposition: form-data; name="key"
                //
                // value

                // Do not limit the key name length here because the multipart headers length
                // limit is already in effect.
                var key = HeaderUtilities.RemoveQuotes(contentDisposition.Name);
                var encoding = GetEncoding(section);
                using (var streamReader = new StreamReader(
                    section.Body,
                    encoding,
                    detectEncodingFromByteOrderMarks: true,
                    bufferSize: 1024,
                    leaveOpen: true))
                {
                    // The value length limit is enforced by MultipartBodyLengthLimit
                    var value = await streamReader.ReadToEndAsync();
                    if (String.Equals(value, "undefined", StringComparison.OrdinalIgnoreCase))
                    {
                        value = String.Empty;
                    }
                    formAccumulator.Append(key, value);

                    if (formAccumulator.ValueCount > _defaultFormOptions.ValueCountLimit)
                    {
                        throw new InvalidDataException(
                            "Form key count limit " + _defaultFormOptions.ValueCountLimit +
                            " exceeded.");
                    }
                }
            }
        }

        // Drains any remaining section body that has not been consumed and
        // reads the headers for the next section.
        section = await reader.ReadNextSectionAsync();
    }

    // Bind form data to a model
    var user = new User();
    var formValueProvider = new FormValueProvider(
        BindingSource.Form,
        new FormCollection(formAccumulator.GetResults()),
        CultureInfo.CurrentCulture);

    var bindingSuccessful = await TryUpdateModelAsync(user, prefix: "",
        valueProvider: formValueProvider);
    if (!bindingSuccessful)
    {
        if (!ModelState.IsValid)
        {
            return BadRequest(ModelState);
        }
    }

    var uploadedData = new UploadedData()
    {
        Name = user.Name,
        Age = user.Age,
        Zipcode = user.Zipcode,
        FilePath = targetFilePath
    };
    return Json(uploadedData);
}
문제해결
다음은 파일 업로드 작업 시, 일반적으로 발생할 수 있는 문제점과 그 해결 방법입니다.
IIS에서 발생하는 Unexpected Not Found 오류
다음 오류는 업로드 된 파일의 크기가 서버의 maxAllowedContentLength에 구성된 값보다 큰 경우에 발생합니다:
HTTP 404.13 - Not Found
The request filtering module is configured to deny a request that exceeds the request content length.
이 구성의 기본값은 30000000으로, 대략 28.6MB에 해당합니다.
이 값은 web.config 파일을 편집해서 사용자 지정할 수 있습니다:
<system.webServer>
    <security>
        <requestFiltering>
            <!-- This will handle requests up to 50MB -->
            <requestLimits maxAllowedContentLength="52428800" />
        </requestFiltering>
    </security>
</system.webServer>
이 설정은 IIS에만 적용되며, 기본적으로 Kestrel에서 호스팅 될 때는 발생하지 않습니다. 이 설정에 대한 더 자세한 내용은 이 문서를 참고하시기 바랍니다.
IFormFile 방식에서 발생하는 Null 참조 예외
컨트롤러에서 IFormFile 인터페이스를 이용해서 업로드 된 파일을 받고 있지만 그 값이 항상 null로 반환된다면, HTML 폼의 enctype 어트리뷰트 값이 multipart/form-data로 지정되어 있는지 확인합니다.
<form> 요소에 이 어트리뷰트가 설정되어 있지 않으며 파일이 업로드 되지 않습니다
(그리고 바인딩 된 모든 IFormFile 형식의 인자들이 null로 설정됩니다).
- 모델: 모델 바인딩 2016-08-11 08:00
- 모델: 모델 유효성 검사 2016-08-12 08:00
- 모델: 응답 데이터 서식화 2016-08-19 08:00
- 모델: 파일 업로드 2016-12-05 08:00


